Author Archives: cowboywithacamera

Canon EOS 7D Mark II Review and Comparison

Canon EOS 7D Mark II Review and Comparison

When the first announcement came out for the Canon EOS 7D Mark II I knew I was going to want this camera. I have owned the 7D since new and found it to be one of my main wildlife cameras and it was the camera that also helped me get to where I am today with my night photography. The new camera is supposed to have great low light capabilities, fast shutter speed and one of the best auto focusing systems out there and all for a great price. In this comparison I will compare the new 7D Mk II to the original 7D and also compare the low light capabilities to the Canon EOS 6D. If you do not know much about the 6D then here is a little run through. The 6D is a full frame, high ISO and my main night photography and landscape camera. I also use it for wildlife but unfortunately it does not have many focus points and a really slow shutter speed. Well, on to the review and comparison.

Canon EOS 7D Mark II Review

Build Quality

The new Canon EOS 7D Mark II has a body that is said to be much more durable and weather resistant than that of the old 7D. The body is made like the 1D series cameras with a full magnesium alloy giving it the ability to take a beating and keep on shooting. Here is a link to original 7D hardcore durability test performed by DigitalRev TV. PLEASE DO NOT TRY THIS AT HOME!!! – www.youtube.com/watch?v=RCT-YMgjm9k

Auto focusing System

The EOS 7D Mark II has an all cross-type, 65-point AF system. This works alongside with information from the 150,000-pixel RGB + IR metering sensor which offers the newest version of the ‘Intelligent Tracking and Recognition’ (iTR) focus system from the Canon EOS-1D X. This means that with iTR engaged and an initial focus point selected, you can select focus and then allow the camera to track the subject as it moves across the frame. In this situation the camera will automatically use whatever AF point is necessary to maintain focus on the originally selected subject as it moves across the frame. There are many adjustments that you can make to this auto focus system to suit your needs for every subject. I love this focusing system when working with wildlife as I can track the subject as it goes behind trees and comes back out without the focus changing from the subject to the obscure object.

Shutter

The camera’s continuous shooting rate changes from 8frames per second to 10 fps. Along with this comes a shutter rated to survive 200,000 cycles from the original 7D which was rated to 150,000 cycles.

Sensor

The main image sensor is a variant of the Dual Pixel AF designed for the Canon EOS 70D. This means 20MP output. It also means the camera is able to capture information about both subject position and depth whenever the mirror is up. This can provide better autofocusing and subject tracking in ‘Live View’ and while shooting video. On the video side of things the 7D II’s movie capabilities are much better than the older Canon DSLR cameras, gaining 1080p/60 shooting capability as well as two choices to render (MOV or MP4)

ISO

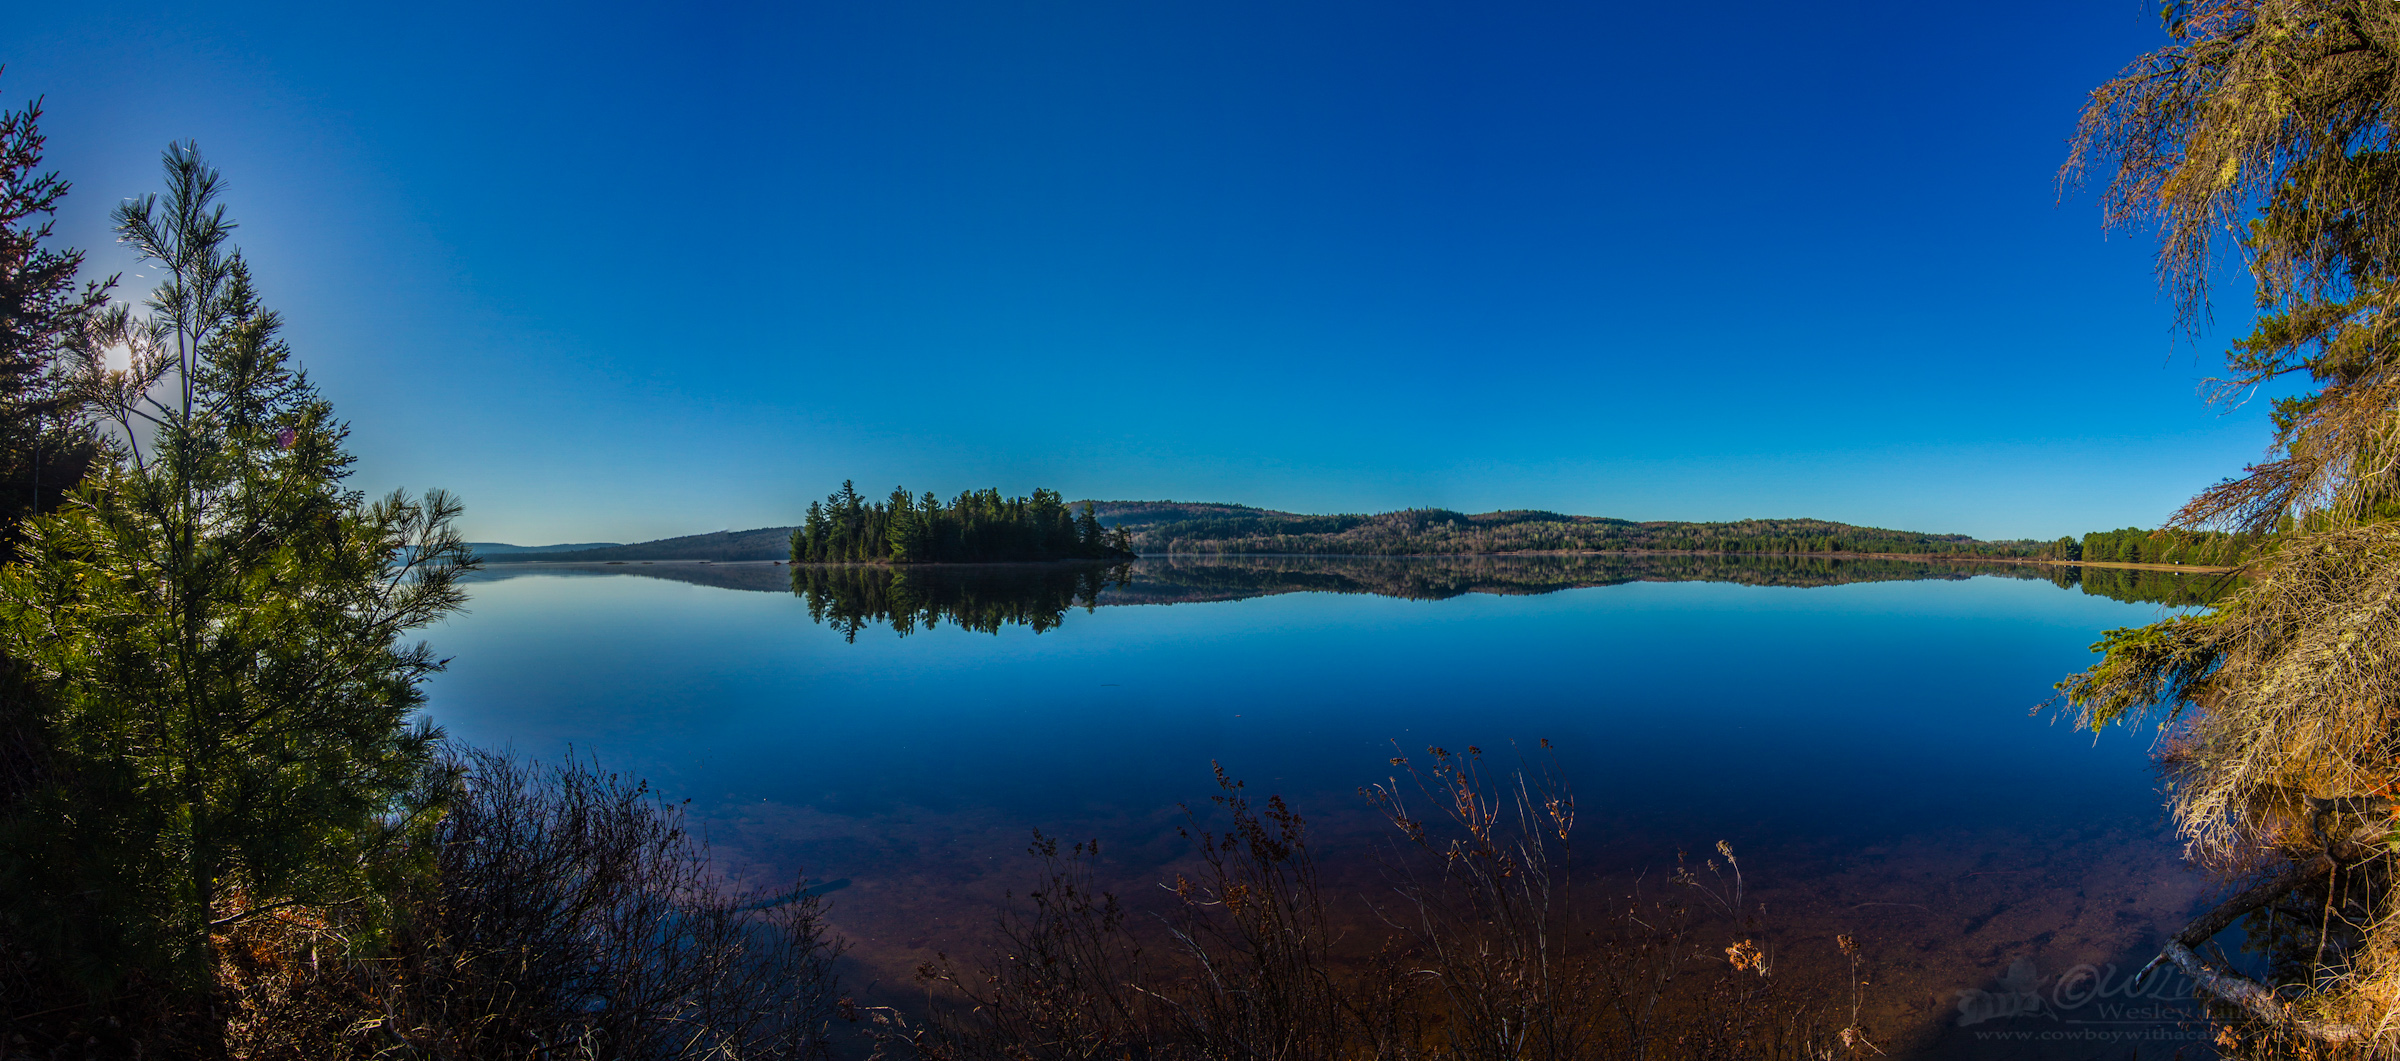
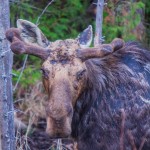
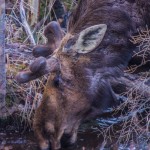
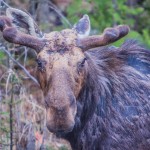
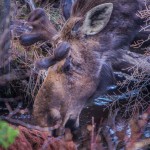
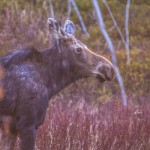
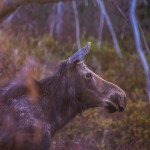
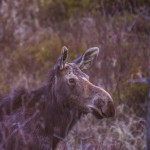
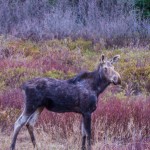
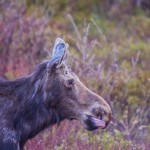
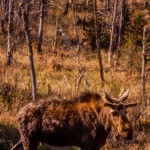
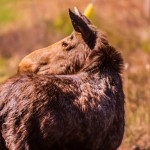
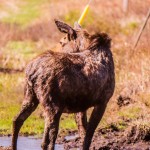
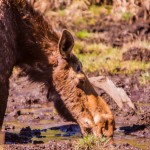
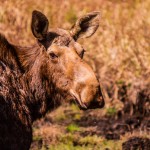
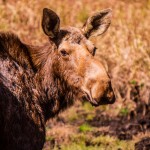
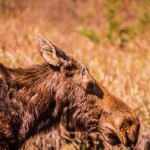
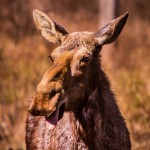
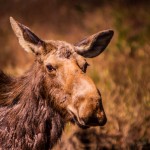
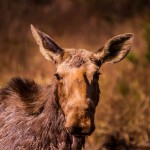
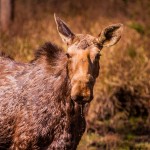
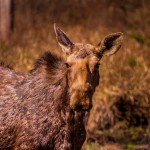
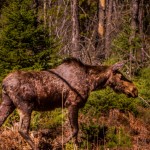
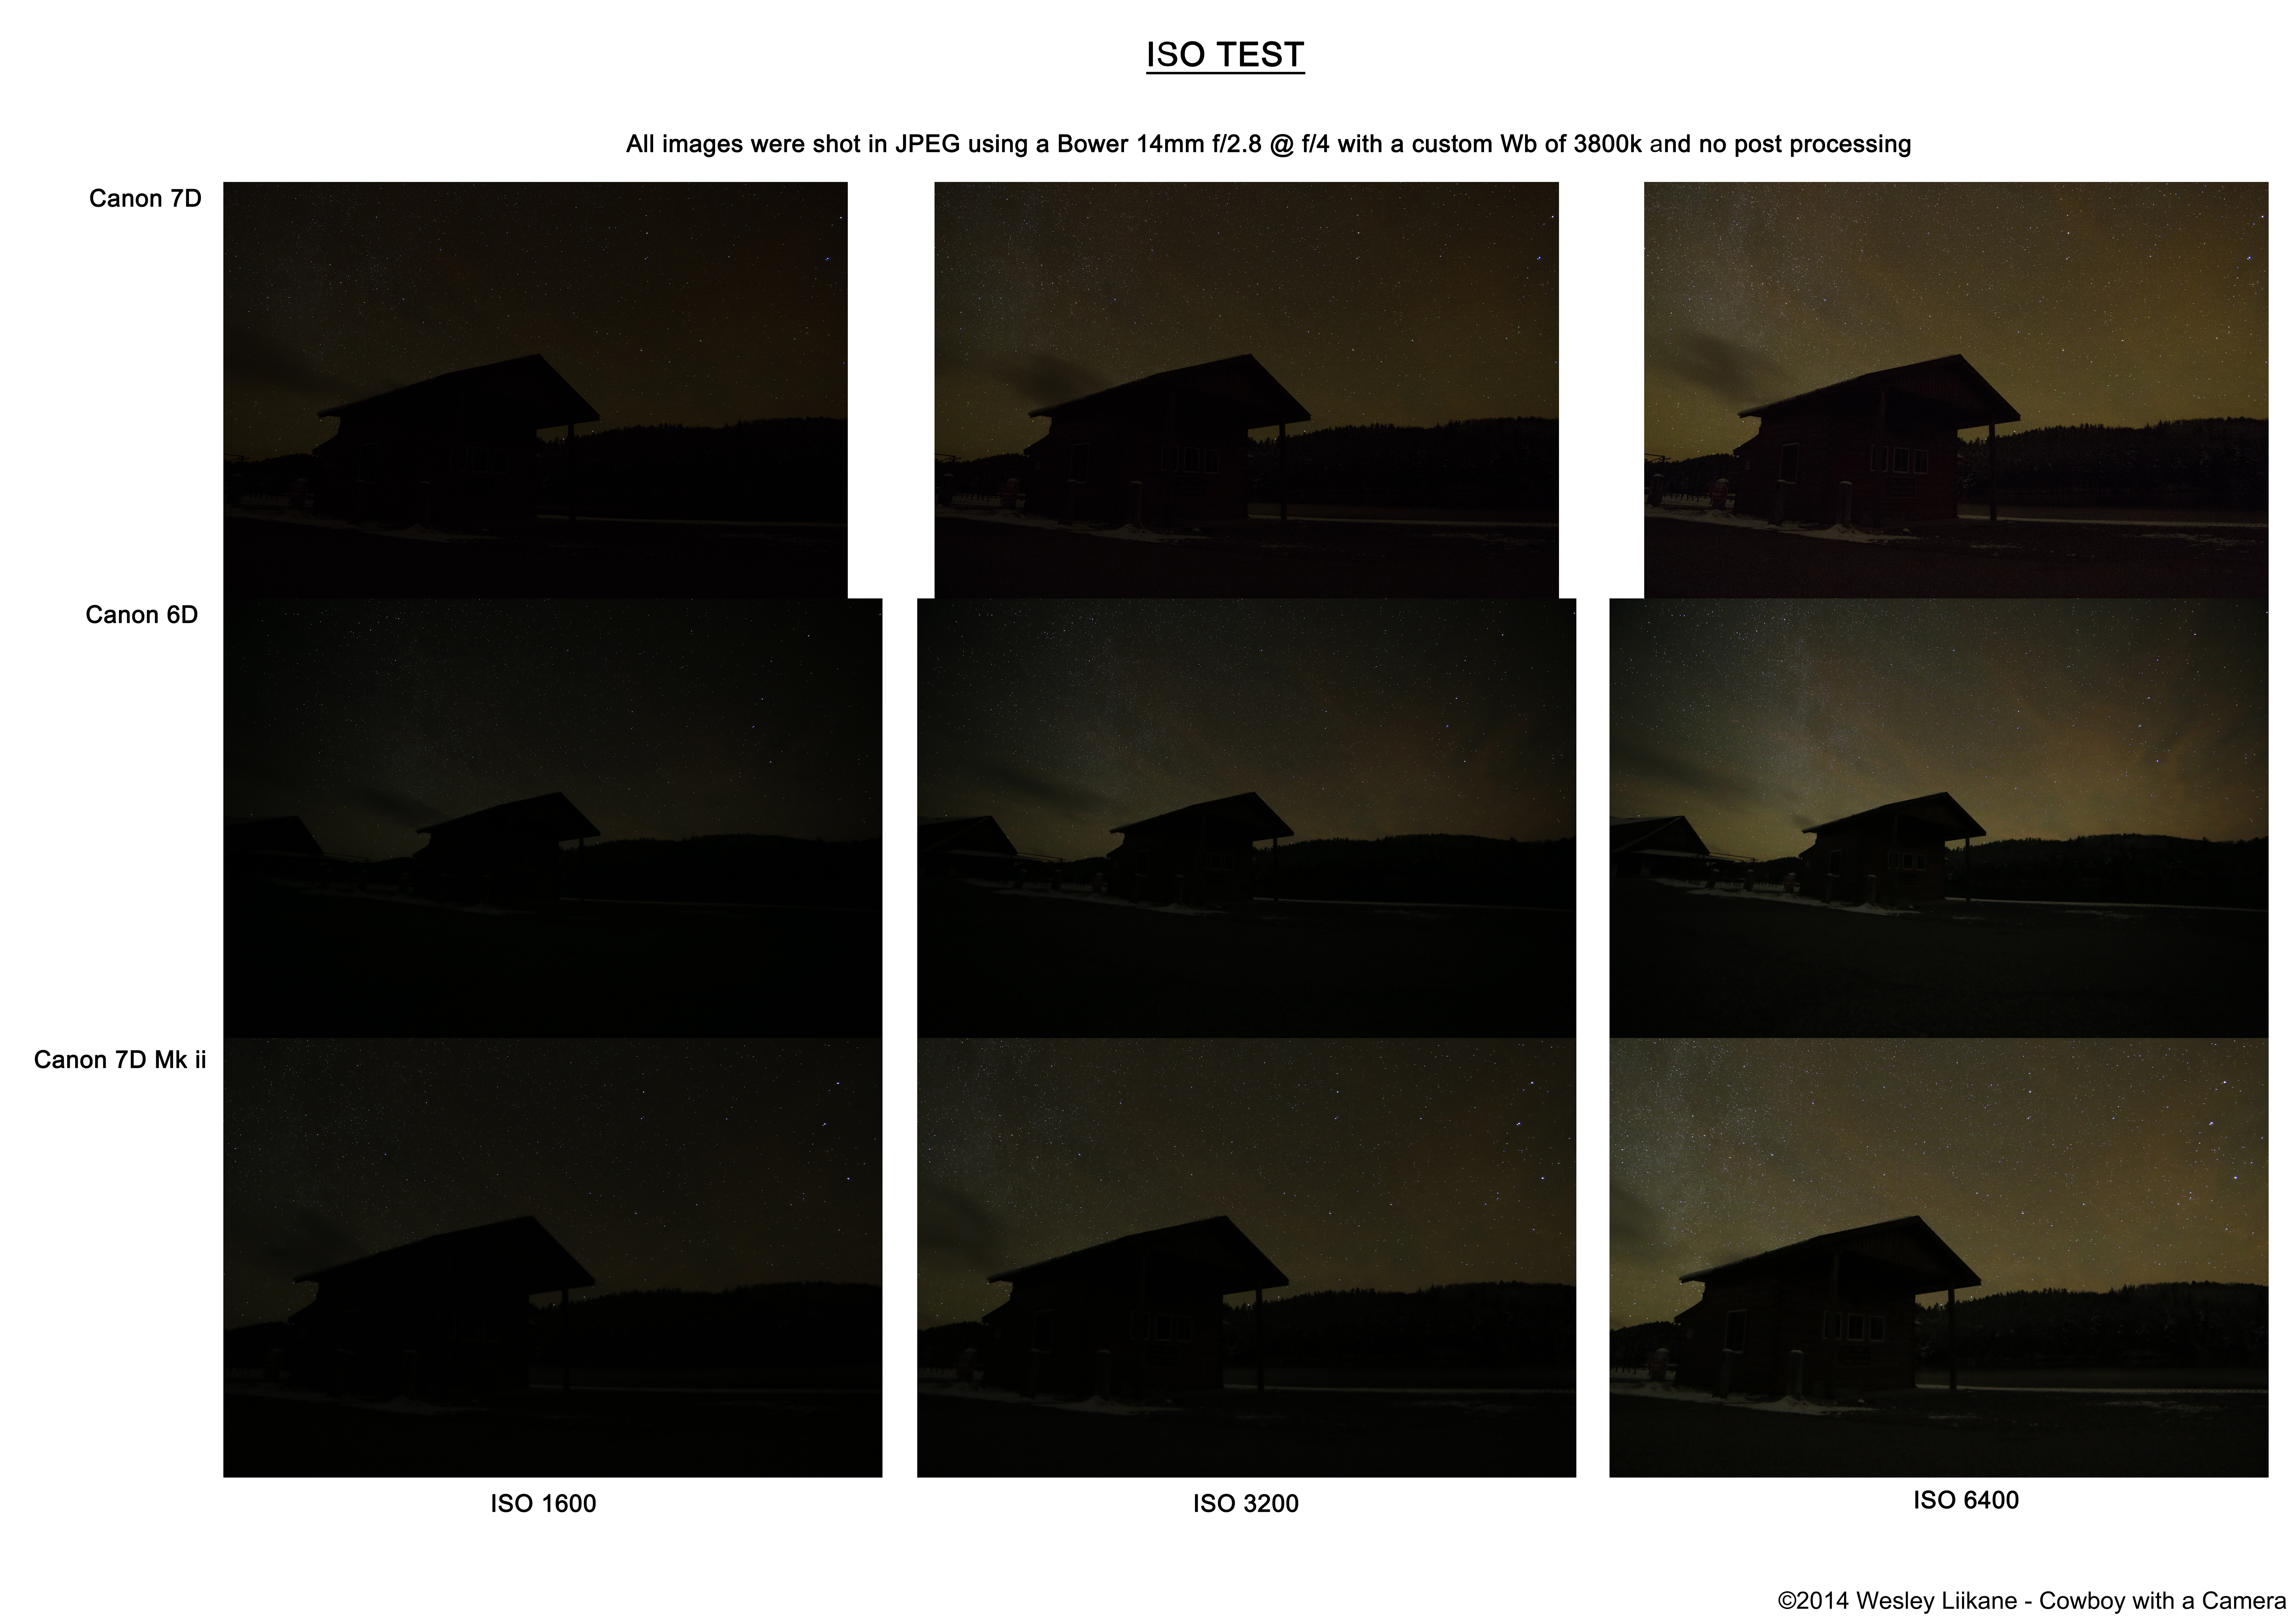
Another great feature of the 7D II is the high ISO settings, in fact the highest in a Canon APS-C DSLR. With the standard ISO range of 100-16000 available in 1/3 stops expansion up to ISO 51200. I tested it out at with some wildlife and at night to show the noise levels from ISO 1600-6400. The camera works extremely well up to ISO 6400 in both day and night conditions, showing great detail in the subject and very little noise.

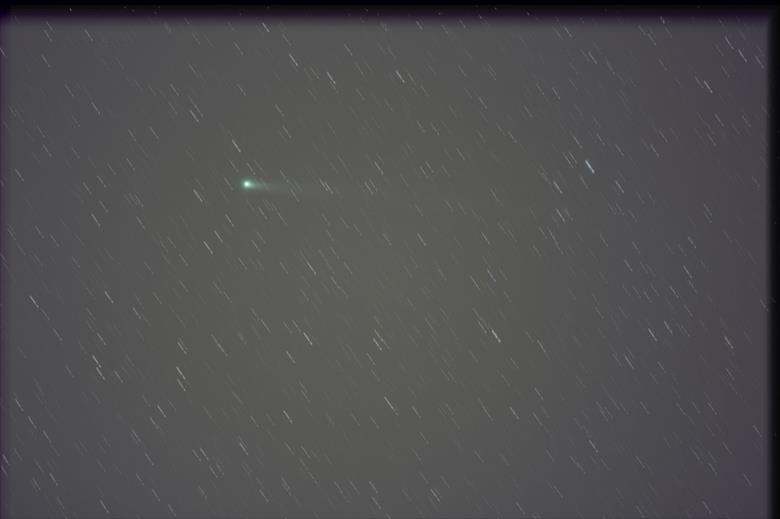
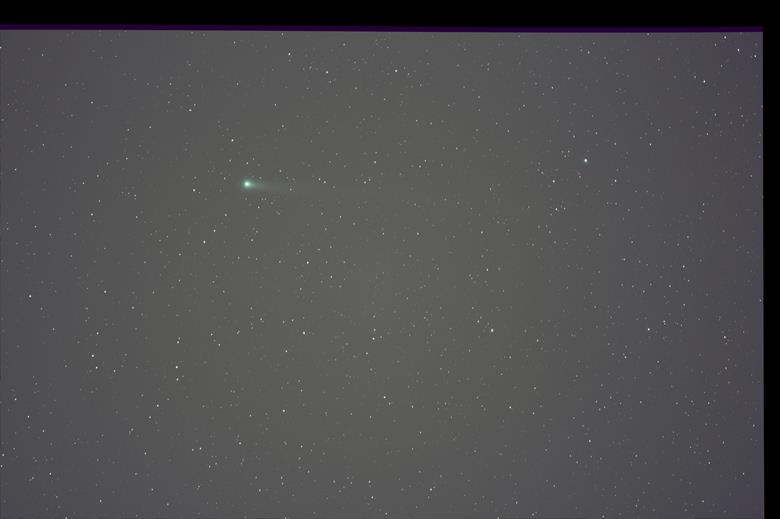
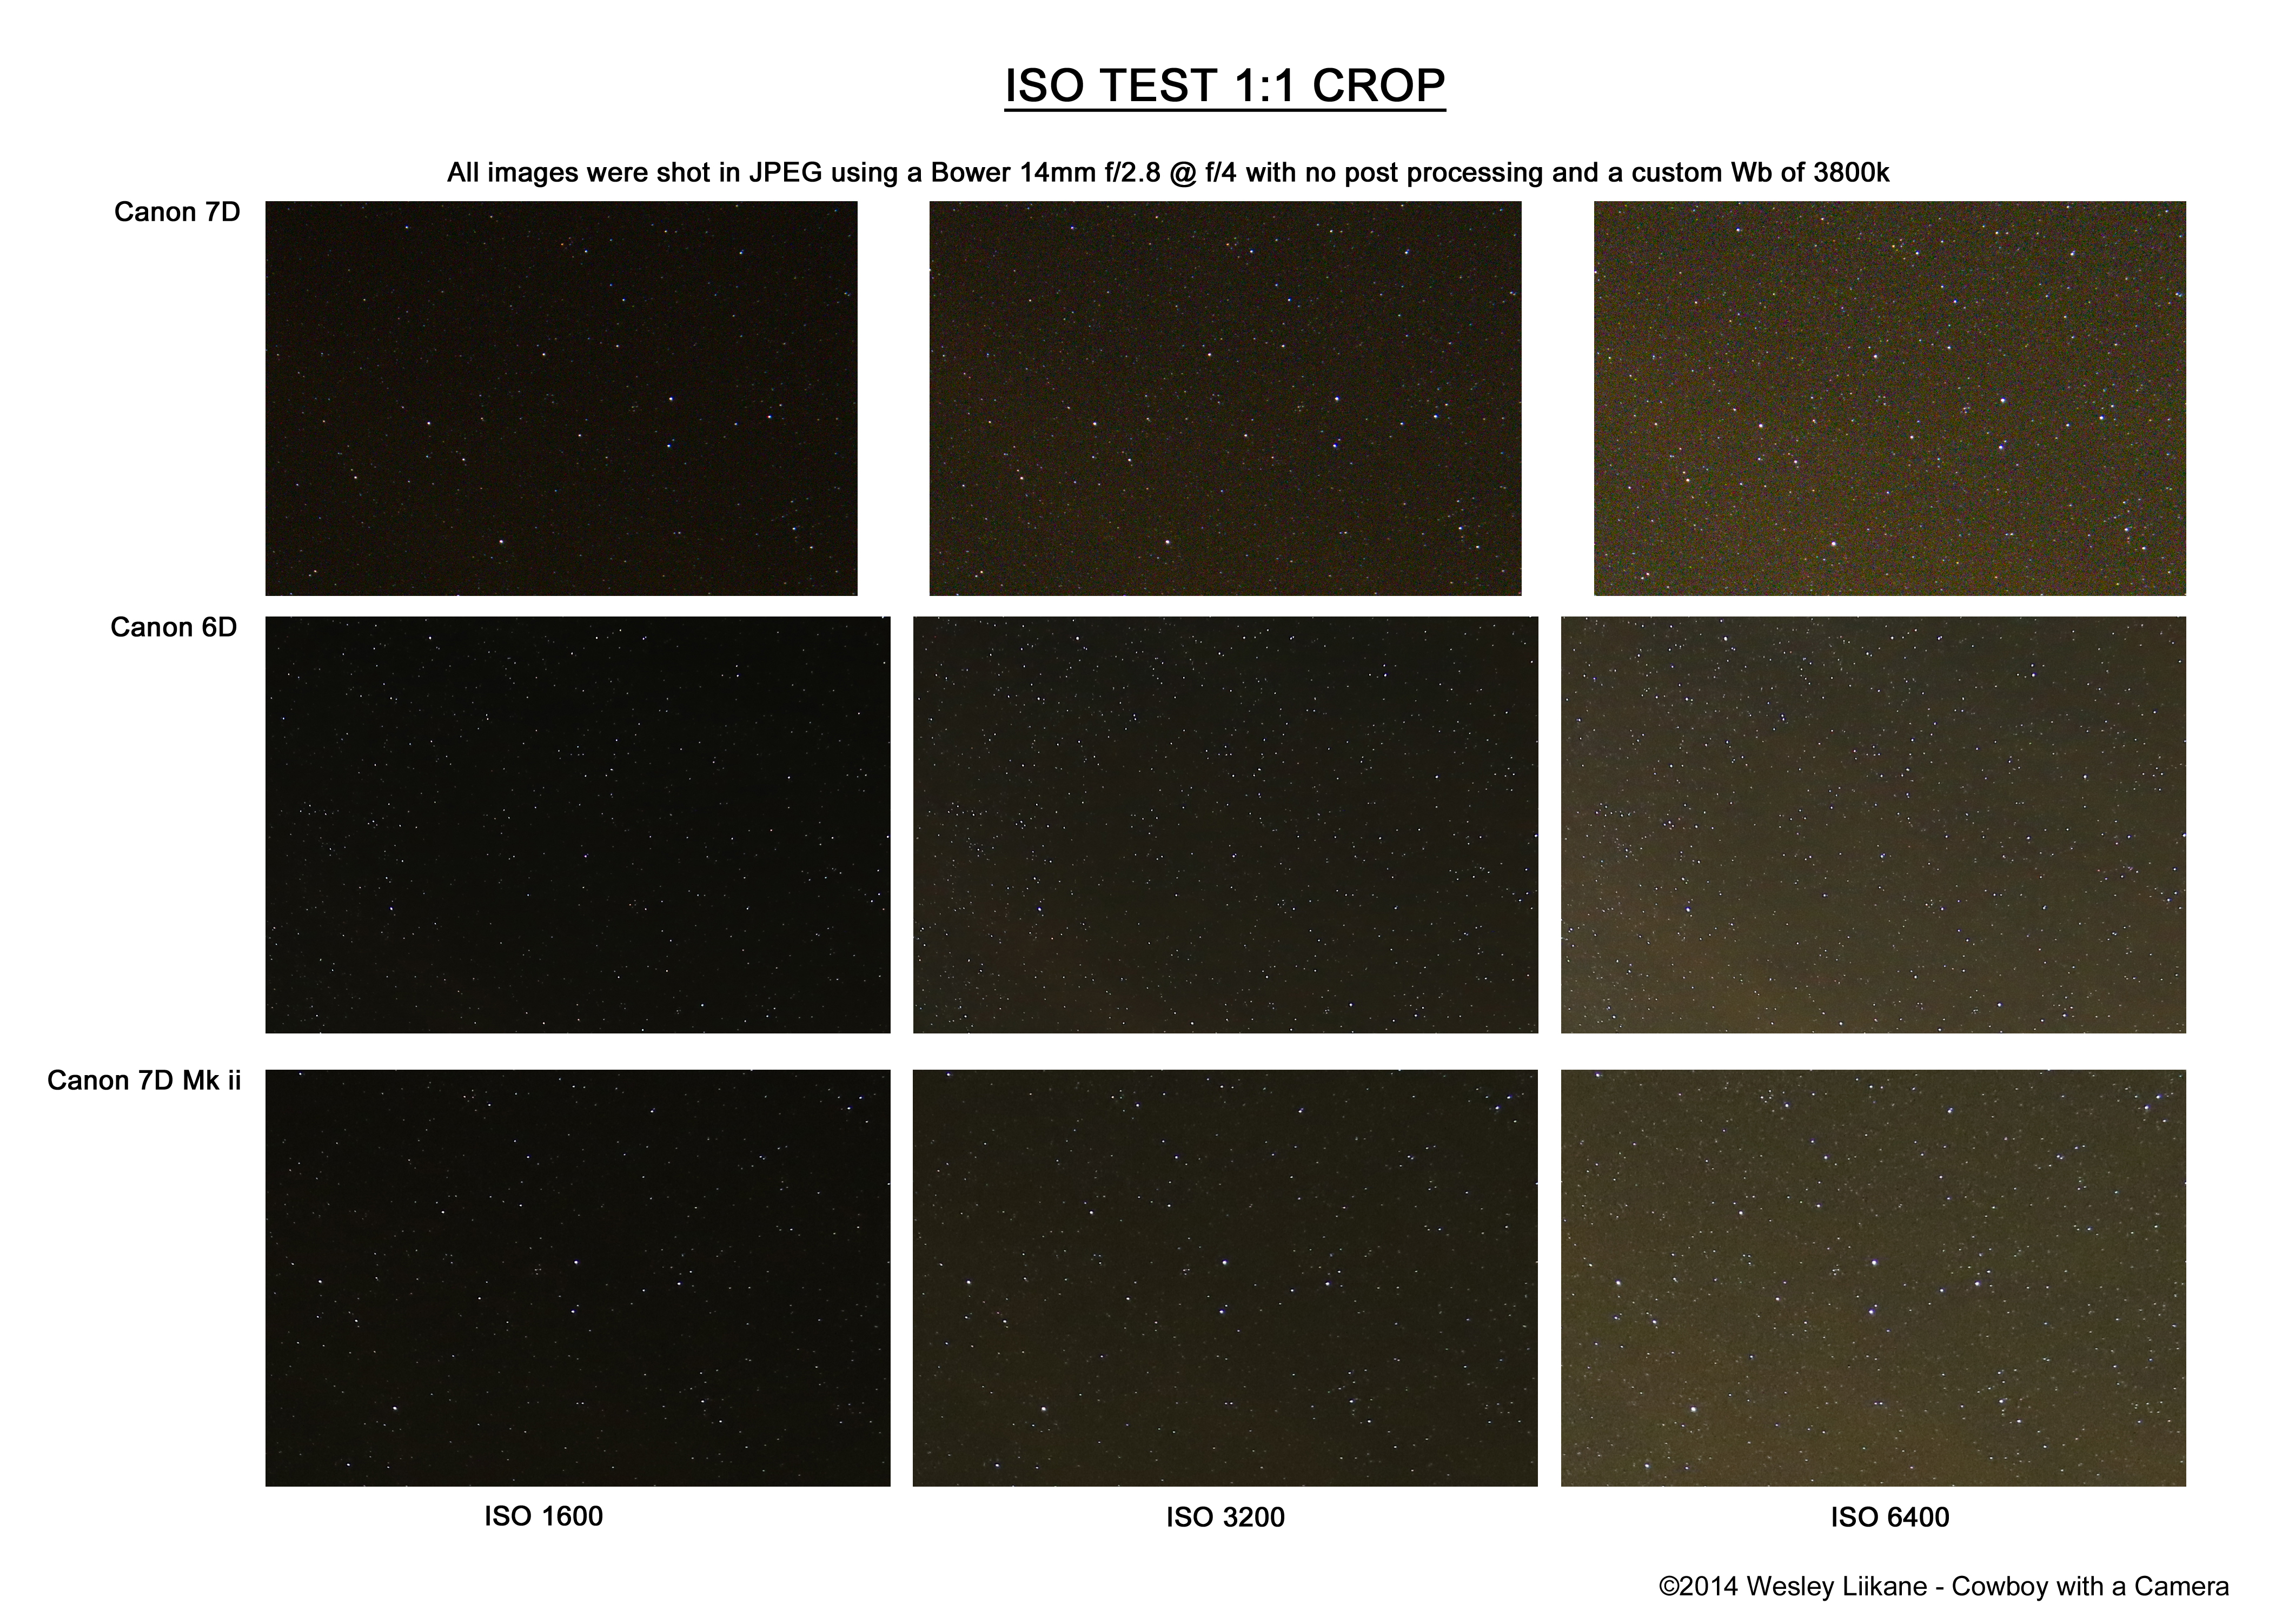
The two test images below can be super enlarged by clicking them. They are JPEG files straight off the cameras with no post processing done to the images other than the 100% crop on the 1:1 images. All images were shot at the same location and roughly the same time at a temperature of -9c.

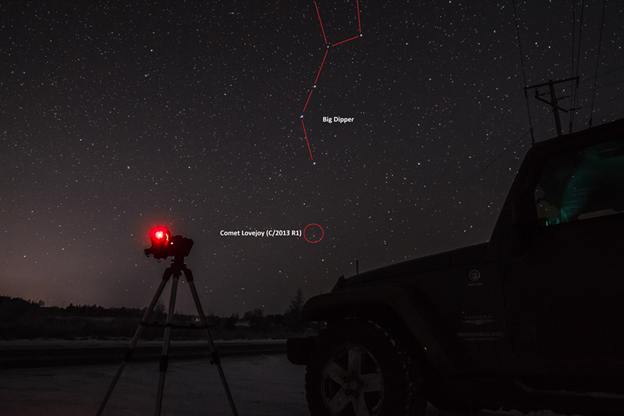
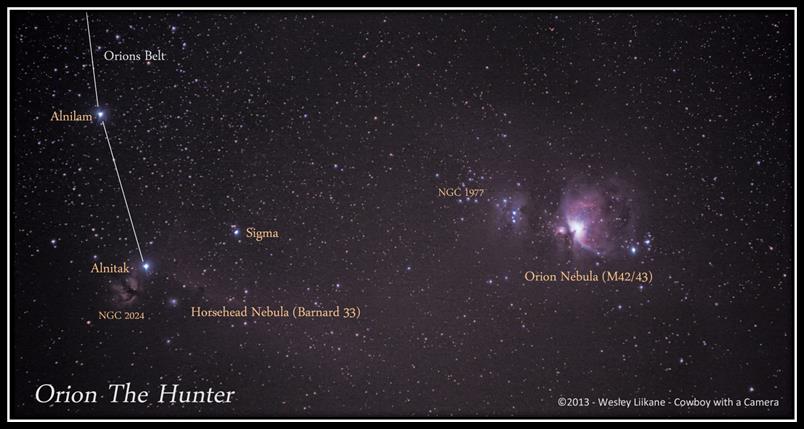
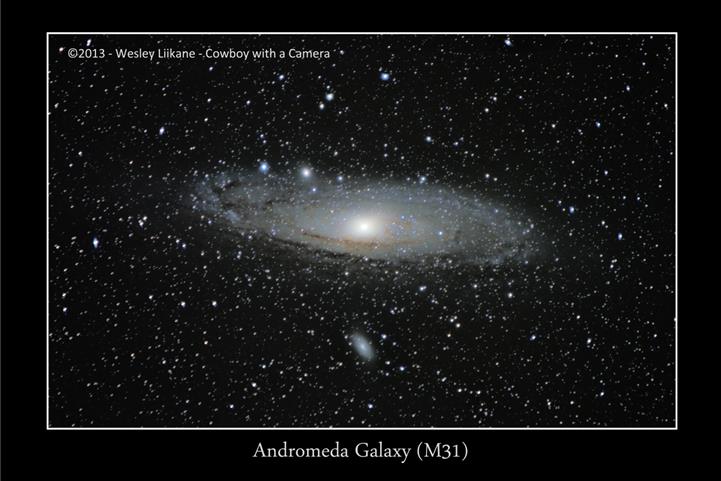
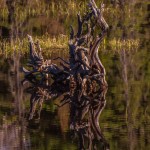
The image specs are Canon 7D mk ii – Bower 14mm f/2.8 @ f/4 – 20 seconds – ISO 6400 and a custom white balance of 3800k.

ISO test full images

ISO test 1-1 copy

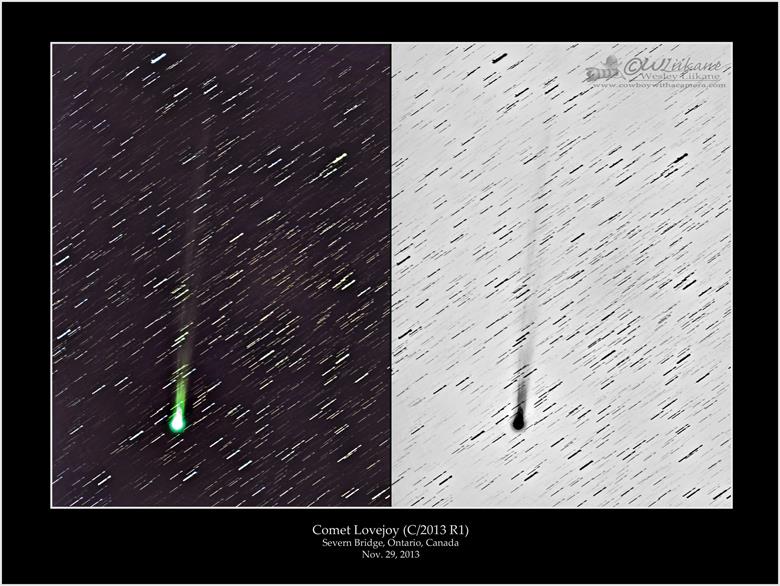
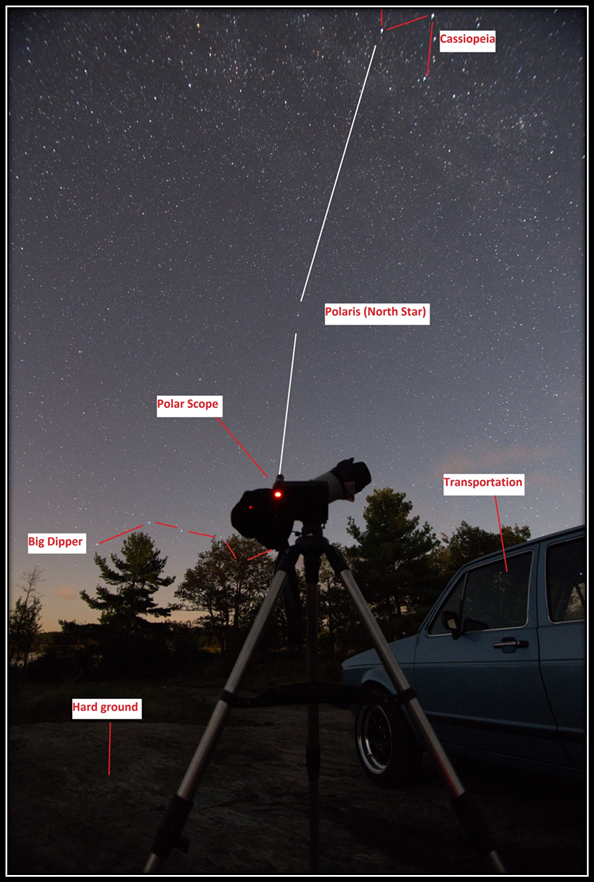
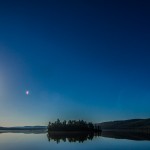
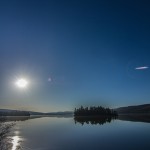
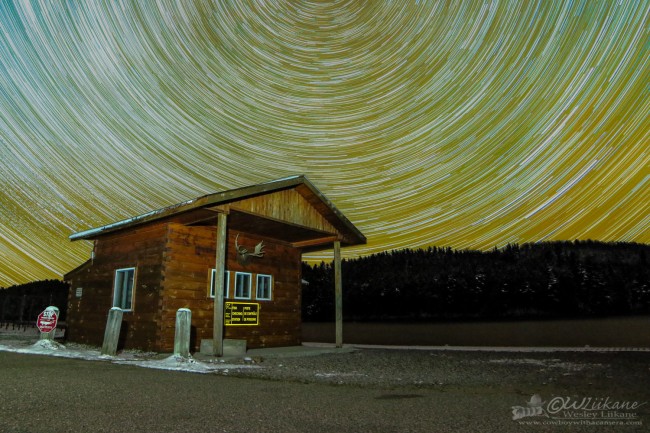
The star trail below is made from the time lapsed images (150 images) along with some light painting to bring out the foreground.

star trail finished

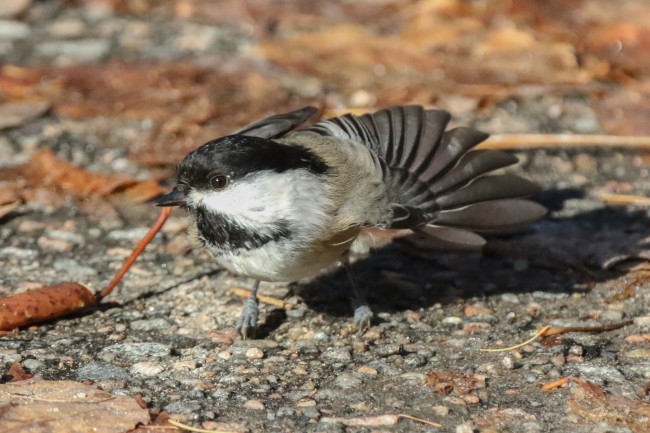
Here is a random black capped chickadee shot at ISO 6400. Again this is a Jpeg image straight out of camera with the only post processing being the crop to help show how little noise there is during the daytime at high ISO.

small images-3

Summary

I am really happy that Canon is going in the right direction with including the built-in intervalometer but unfortunately the intervalometer is limited to where and when you will want to use it. When using the built-in intervalometer you will want subjects where lighting is not going to change such as sunsets, sunrises or day to night as the interval is only set for the gap between shots and not as an overall interval. With many external intervalometers you set the interval and want to make sure that the shutter speed is always going to be less than the interval so no overlapping happens. So even if the shutter speed is changing constantly the overall interval will be the same making smooth transitions in the final time lapse. The link below is a test done with the built-in intervalometer.

www.youtube.com/watch?v=mFH8Pq1BfL8

Many of the downsides to this camera mean nothing in my opinion. It is up to you whether you want durability or some neat features. If you want neat features then go get the Canon EOS 70D or some other camera but if you want an amazing wildlife camera then I would say you have found it with the 7D mk II. During the 24 hour test I did, I managed to cover the camera in snow, had the body and lens covered in water from the snow falling off the trees, went through multiple changes of temperatures and conditions and not once did the camera show any weakness to those.

All and all this camera is amazing! I know that I have tortured my original 7D and well exceeded the shutter count while enjoying every minute of it and it still works great. Now it is time for me to do the same with the 7D mk II. This new camera is filled with so many upgraded options which will make this my new first choice camera for wildlife photography and a great secondary camera for landscape and night sky photography.

Pros

  • Magnesium alloy body (great durability)
  • 65 autofocus points and iTR
  • High ISO for low light capabilities (very little noise up to ISO 6400)
  • Higher shutter speed at 10fps and a higher shutter count of 200,000
  • Built-in GPS and compass
  • The multi directional joystick with the new auto focus area selector lever
  • Takes the original LP-E6 and the new LP-E6N lithium ion battery packs. Note: the LP-E6N has an increase in storage capacity from 1800 mAh to 1865 mAh
  • Mode dial lock
  • Built-in intervalometer (this is good and bad as stated above in the summary)
  • Dual card slot: one can accept SD/SDHC/SDXC media while the other is compatible with CompactFlash (CF)

Cons

  • No built-in Wi-Fi (attachable Wi-fi transmitters are available)
  • No built-in grip (attachable grips are available)
  • No 4k video (go get a video camera if you want this)
  • No articulated screen or touch screen (go get the 70D)
  • Built-in intervalometer (external ones have much more options to suit your specific scene)

Comet Stacking Tutorial using DSS

Comet Stacking Tutorial using DeepSkyStacker (DSS)

Location of Comet Lovejoy Nov. 29, 2013

Location: Severn Bridge, Ontario, Canada


Comet Lovejoy is moving but here is the image showing where Lovejoy was on the 29th of November. It is working its way toward the Boötes constellation. For more informaiton on where Comet Lovejoy is and locations on other objects you can download http://www.stellarium.org/ for free.


DeepSkyStacker – Comet Stacking (Link to DSS download http://deepskystacker.free.fr/english/index.html)


Using DSS to stack comets can be tricky and take some time. You will want to open your light, dark and flat frames into DSS. Once loaded into DSS you can now go down to “settings
and select stacking
Stacking Settings“. Then select “comet” and from there you can select the stacking method you would like to use. Each method has a descritption with it explaining the stacking method and what it will look like.

Now you can select “Edit Comet Mode

Selecting the comet out of each frame can be time consuming but remember to save EACH image you select a comet on. You can not go through the list and save as a whole, you must save each image as you go. Now to select the comet you can adjust your threshold, making more stars selectible in the image. The best way to select the comet though is by holding down the shift key and then selecting the comet. Note the little box on the top left in DSS is a zoomed in preview. Using this you will want to make sure when selecting the comet that the selection is in the center of the comet nucleus. Image below has a red circle for comet center and where to save each image as you go.

Once each light frame has a selected comet in it you can now stack these images. Make sure to keep an eye on the comet processing in the menu before stacking to make sure you are stacking with the method you wanted.


Stacking Methods

All images below are unproscessed DSS images of Comet Lovajoy (C/2013 R1) taken November 29, 2013 from Severn Bridge, Ontario, Canada

EXIF info:

Canon EOS 6D | Canon 70-200mm f/2.8 | f/2.8 – 200mm | ISO 1600 | 180 seconds x29 +darks and flats


Standard Stacking

This method does not work with comets

Comet Stacking

This method shows the movement of the comet through space.

Star + Comet Stacking

This method stacks both on the comet and the stars, making both crisp in the final image.

Processed Image of Comet Lovejoy using DSS, Ps and Lr

Deep Space imaging with a Tracker and a DSLR *NO TELESCOPE*

Deep Space imaging with a Tracker and a DSLR – NO TELESCOPE

Preparation

Go online and find out what is in the sky and for information on this you can go to

http://earthsky.org/

http://www.heavens-above.com/

http://www.calsky.com/cs.cgi/Calendar


Camera and Equipment Check Sheet

  • Camera: (long exposures will be used, so camera with bulb mode is needed)
  • A lot of memory cards
  • A lot of batteries
  • Steady tripod
  • Star tracking system
  • Dew controller (hand warmers work great if you attach them under your lens to stop the condensation, dew or frost from building up)
  • Remote shutter release/ Intervalometer
  • Proper footwear/ clothing
  • Bug Spray
  • Food and Drinks
  • Flashlight (RED lights are recommended for your eyes, and any other light if you want to do some light painting and to see at night)


The steady tripod and solid ground is a major part of tracking and viewing in the night sky. The tripod should be very sterdy and setup in a level position or in a way that people, wind or anything won’t knock it over.

The tracker you can make or purchase. The one used here is a motorized tracker with 2 speeds of x0.5 which is for landscape shots to keep a crisp subject but also get a little more time on exposure in the sky. X1 is the speed which is used to tracker the stars at earth’s rotation. The tracker runs on 4xAA batteries and can last around 24hours with full charge.

POLAR ALIGNMENT

Polar Scope view

The polar scope is comes with the iOptron. It is a scope you look through and line up Polaris “The North Star” with in the target finder. Your latitude is the angle the scope will be pointed upwards to find Polaris. Polaris sits right in the middle of the Big Dipper (Ursa Major) and Cassiopeia (the “W”) and can be located by following out from the scoop to Cassiopeia, for more help refer to images below. The longitude and time is for lining up Polaris in your polar scope. Time and location of Polaris in the polar scope is key to getting the most accurate tracking and longest exposures without trails. For more information on finding where to line up Polaris in your scope you can download the app from iOptron.

Now you can install your DLSR camera onto the ball head and point the camera to the sky you are interested in. Make sure all the screws/locks are tightened, select S/N switch based on your location and be sure to check the tracking speed of 1X for imaging, as ½ is for landscapes, or panning etc. Double check the polar alignment and realign it if needed. Turn the power switch on and enjoy the photographing.

To locate the objects you want to photograph you can use apps, such as StarWalk for iPhone, or do some research on Google to see find more information on the subject area. Some easily viewable objects to photograph are Andromeda Galaxy and the Orion Nebula. These you can photograph with any size lens and still get some detail but to get the most detail I recommend using a 200mm or larger lens.

Finding The Orion Nebula

The Orion Nebula (M42) is located in the Sword of the Orion Constellation and is the middle star in the sword, note in Orion’s Belt the most easterly star hold 2 more nebulae, Flame Nebula (NGC 2024) and Horsehead Nebula (Barnard 33)

Above image was take with a Canon EOS 7D – Canon 70-200mm f/2.8 with Sigma x2 – f/5.6 @ 400mm – ISO 1600 – 179 seconds

20 Light Frames + 8 Dark Frames


FOCUSING AND EXPOSURE

Focusing and exposing can be very difficult at night and all must be done manually, also having a camera with a live view mode can really help. Point your camera towards a very bright object in the sky and turn ISO to max with your aperture wide open. Viewing through live view mode you may not see much, so zoom with live view to x5 or x10 and begin to slowly adjust your focus ring until the stars become nice sharp circles.

Now to locate the subject you would like to photograph in the sky you can loosen the ball head, zoom out and point towards the subject area. Taking shorter exposures with the highest ISO to see what is out there and in frame. Once you have located the object you wish to track, you can zoom in or keep shooting but remember to lower the ISO to around 800-3200. Also make sure you are shooting RAW to get as much data out of the image.

A good start would be a wide open aperture, ISO 800 and a 3 minute exposure. Be sure to zoom in the image all the way to make sure NO star trailing is taking place.

Note: Turn OFF long exposure noise reduction as it will take the same amount of time to process in your camera as the exposure. So if you shoot a 3 minute exposure the camera will take 3 minutes to process. Do not worry you will be taking dark frames manually which is why the camera takes so long to process.

Post Processing and Stacking

Software: Lightroom, Photoshop, DeepSkyStacker (DSS)

Link for DSS: http://deepskystacker.free.fr/english/index.html

Why stack? To bring out more details in the stars and faint objects like galaxies and nebulas.

Image above is a crop of the Orion Nebula taken with a Canon EOS 7D – Canon 70-200mm f/2.8 – ISO 800 – 119seconds.

Above image shows the difference in detail with stacking.

In DeepSkyStacker (DSS) you can stack light, dark, flat and offset/bias frames. I choose to shoot only light frames and dark frames. Dark frame must be taken in the same conditions, temperature and setting as your light frames. These are taken by covering up your lens (putting your lens cap on) and shooting the exact same exposures used during the shoot, so it’s always good to take them just before, during or just after your shoot. The dark frames are the main part to reducing noise and eliminating hot pixels from your final image.

Once you have finished your shoot I would suggest loading them onto the computer and make folders for your images labeled “Lights” and “Darks” under each object photographed. This helps when loading in DSS.


DeepSkyStacker

Light frames are very important for your final image so preview them, zoom in and make sure no images have any star trails (the ones with star trails should be deleted or moved to another folder) Once you have selected the images you would like to load, select Open picture files in DSS and then select desired light frames. Next, you will select “dark files…” in DSS and select your dark frames to be loaded. Once you have loaded your light frames and dark frames click “Check all” then click “Register checked pictures…” Select the advanced tab and click “compute the number of detected stars.” If the number of stars is too low or high it may not stack properly or may take very long to process. Try to get over 50 stars. Note this will not affect the number of stars in the final image and is only used for lining up the stars. No more than 100 will be used even if it says 1000 stars found. Once you have adjusted the threshold go back and select the best % area and insert the number you would like, usually 80-100% as we have already picked out most of the bad or trailed images. Then click ok and then ok again to start stacking. This process could take a while so now is the time to go grab a coffee or something. 😀

Now you have a stacked image that may appear darker or lighter than the image you were hoping for so you will have to adjust the histogram accordingly. Try to get the curve nicely into the RGB area and hit apply. Note no changes will happen until you hit apply and if the changes are not what you like, hit reset and apply. Next, you can adjust the curve itself but is really not needed. Saturation can be tricky to adjust. You want to add some saturation to bring the colours out but without pushing it so far that the object appears unnaturally coloured or you change the background colour. Minor adjustments can be made later on in Photoshop (Ps) or Lightroom (Lr).


Example A – A histogram too far to the white and dark side


Example B – Proper histogram and some saturation added


Lightroom or Photoshop Edit

Now that you have a stacked image from DSS you can load it into (Lr) or (Ps) to do the final adjustments in order to bring the most out of your image. In Ps the first thing is to make a curves adjustment to bring out more detail from the histogram. Making the shape of an “S” to darken the blacks and bring out the whites and mid tones. Once you have finished the curves adjustment you can do a levels adjustment to bring the blacks out of the background. The best way to do this is to slowly adjust the curves and levels. By doing this multiple times you will to pull more information from the histogram without pushing the histogram so much it spikes. Once this is done you can do your final adjustments to the white balance to make the stars true in colour.


Adjusting the Curves – Ps

Histogram Spiking – Ps


Curve – Lr


Final Image


Detail vs Time


Andromeda @400mm

Algonquin Moose Shoot

The first weekend of May made for some great photo opportunities. The Eta Aquarid meteor shower was peaking, the subaru spring fling and of course this, the moose shoot! This was my first time going out and capturing images of moose. It was a amazing time with some amazing people. Driving down Hwy 60, Algonquin Park, Ontario, Canada I managed capture and see a nice number of moose. I had such a good time!!! 😀

Algonquin Moose Shoot Pano - Lake of Two Rivers


Subaru Spring Fling

What another great weekend! Over 200+ Subaru’s, lots of great people and some good eats! Thanks TSC for running yet another great event! 😀


Images on this website are for viewing purposes only and are copyright protected and owned by ©Wesley Liikane – Cowboy With a Camera. Therefore may not be downloaded, copied or reproduced in any way. Failure to do so may result in legal action.

Feel free to send us a message and we will try to get back to you within 24hours

Your Name (required)

Your Email (required)

Subject

Message